
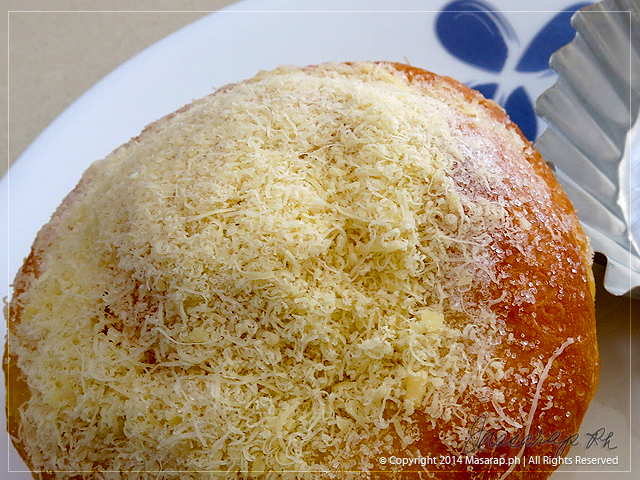
The Ensaymada is in many ways like the French Brioche but Filipino ingenuity makes it just so Pinoy – that sugar and grated Edam cheese (keso de bola) on top and it’s snail-like shape. I always say, ‘when I was a young child’ well, this is one of those again. I learned how to make Ensaymada from my mother and it was a whole day affair and it still is, but with the help of my Kitchen Aid, I do not have to shed so much perspiration to make it; the machine does that now. In the good old days, incorporating the butter was like preparing for a boxing match. Your hurled the dough against the marble slab to make sure the butter was taken in by the dough and this took a good one hour. Now, all you have to do is knead the dough by hand for the last 10 to 15 minutes just to refine it.
I remember when I first made this on my own; they were as hard as baseball balls and bounced off the floor where I threw them in disgust! That’s many moons ago and this particular recipe is my very own from the hundreds of experiments that I have done. It’s easy to just buy it from your favorite bake shop but there’s nothing like doing it on your own when you have a whole day to spare. It’s very gratifying!
- Preheat oven to 300ºF or 160ºC fan forced
- Baking time is 15 minutes
- Makes 16 pieces of 100 grams each roll
- Grease pans with shortening
Ingredients:
Sponge stage:
- 2 tablespoons instant dry yeast
- 1/4 cup honey
- 1 cup warm milk or 1/2 cup warm water and 1/2 cup evaporated milk
- 100 grams cake flour
Second stage:
- 3/4 cup (150 grams) sugar
- 1/2 cup egg yolks
- 300 grams cake flour
- 1 teaspoon salt
Third stage:
- 1/2 cup whole eggs
- 400 grams bread flour
- 2/3 cup (165 grams) butter and 1/3 cup (85 grams) dripping (rendered fat from pork and beef) or just buy from the supermarket – both at room temperature
Topping:
- 1 cup grated Edam cheese or Pecorino
- sprinkle with sugar
Procedure:
Sponge stage:
- In the mixing bowl of your Kitchen Aid or mixer, place 100 grams cake flour and yeast; mix.
- Pour in honey and warmed milk.
- Put the paddle attachment of mixer and mix on slow speed for 5 minutes.
- Stop and let it rest, covered with damp cloth, for 15 minutes.
Second stage:
- Turn on the mixer at low speed and pour in the 1/2 cup egg yolks, one at a time, mixing well after each addition.
- Mix in the sugar and mix well.
- Add salt to cake flour. Mix well so that salt is evenly distributed into cake flour. Spoon in the cake flour and continue to mix till all the flour in incorporated.
- Stop mixing. Cover with damp cloth and let rest for 1 hour.
Third stage:
- Change the paddle to the dough hook.
- Turn mixer to low speed. This is number one.
- Pour in egg yolks, one at a time, mixing well after each yolk.
- Blend in flour, 1/2 cup at a time, mixing well before adding next 1/2 cup.
- When you cannot see any flour, start adding the butter and lard by the tablespoon. Making sure that the butter and lard are well incorporated before adding the next spoonful.
- Do this till all the butter and lard have been incorporated.
- This will take you about 40 minutes.
- Keeping the speed at low or number 1 speed, let the machine knead the dough for another 15 to 20 minutes.
- Stop the machine.
- Turn out the dough on a smooth surface; not wood; marble, stainless or other. Continue to knead by hand the dough for another 15 minutes. You want the dough to be very smooth.
- Using a plastic bucket, grease the bucket with butter and place dough inside and seal with cover.
- Let the dough rise for 1 to 2 hours or until the dough has more than doubled in bulk.
- Divide dough into 16 pieces of 100 grams each.
- Cover the dough balls with plastic wrap to prevent hardening or losing moisture.
Making the snail shapes:
- Place the individual piece on a butter greased surface.
- With a rolling pin, roll out dough into a 12-inch by 4-inch rectangle.
- Brush softened butter on top of the surface of rolled dough.
- Starting from the wider side, roll in towards opposite side. Pretend you are making a long tube.
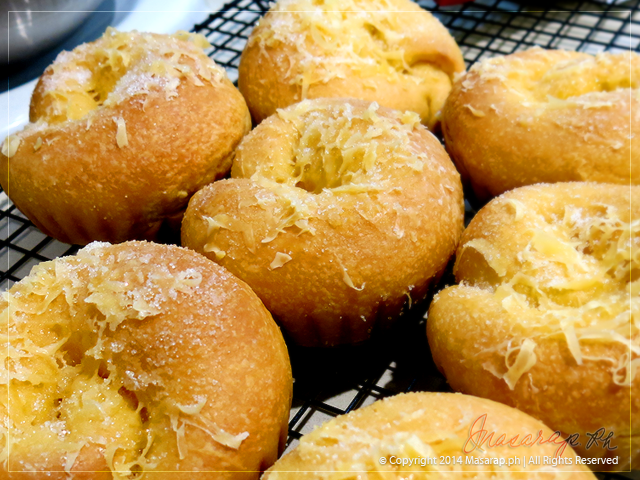
- Holding down one end of the long tube, start coiling the dough around itself.
- Place on individual Ensaymada mold that has been greased with shortening.
- Keep doing this until you have made all the 16 ensaymadas.
- Place the ensaymadas on a tray and cover with Saran Wrap and place inside proofing place or inside a cabinet or inside unlighted oven to rise.
- The dough must rise till more than doubled in bulk.
- This takes anywhere from 3 to 5 hours.
Baking the Ensaymada:
- Pre-heat oven to 300ºF (160ºC) or 280ºF (150ºC) if fan forced oven.
- When the thermometer has reached needed heat, place 6 ensaymadas in oven and bake for 15 minutes or till the surface of the ensaymadas is a very light tan.
- Remove from oven and place in cooling rack.
- Immediately brush with butter, sprinkle with sugar (1 tablespoon each or less), and top with grated cheese (1 tablespoon each or less).
- Cool in mold for 5 minutes and then transfer to wire rack to completely cool.
- When completely cool, wrap individually in waxed paper or Saran Wrap.
- To reheat, place in microwave for 15 seconds.
- To reheat in oven, warm oven to 350ºF (180ºC) and place ensaymada in oven for 5 minutes.
Notes:
- Do not attempt to do this unless you have read enough information on bread making or have experience in making bread. Or be prepared for baseballs!
- To proof the dough, I use a plastic bucket with a cover; it’s faster and not weather dependent.
- You can use any grated hard cheese for topping. The special ones use Edam cheese or Queso de Bola and the commercial ones use cheddar cheese.
- Dripping can be bought in supermarkets. To make your own, you have to slowly pan fry pork or beef fat or both, over low heat till the fat comes out and this is what is used. I use the commercial, store bought one.
I can’ t wait to try this! I have been looking for days now to find a perfect recipe for ensaymada. I have seen a recipe of a bread that called for cake flour to make it soft but I could not find one for ensaymada. Is this the cake-like,soft and fluffy version or a rich and a little on the heavy side one? I hope it’s the cake-like version. Have you tried incorporating tang zhong(water roux) and/or mashed potatoes? Thank you and God bless.
It also took me quite some years to come up with this recipe. It’s not as air like as what you find commercially because this recipe is more true to the original, old fashioned type. I did tweak it a bit to make it a bit lighter but it is still very rich. I have not experimented on water roux and mashed potatoes. The difference with the modern version is the use of drippings and butter which gives it a very distinct taste. Most of my recipes are old fashioned in flavour but with modern techniques. I hope this comes up to your expectation and good luck.
Hi Marianne! Thank you for the reply. I have tried this recipe and it is TO DIE FOR! It’s the best ensaymada recipe I have tried.
I just have one question. On the third stage, it says there whole eggs, but in the procedure it says add the egg yolks one at a time. I am just curious which one is the right way. I did the egg yolks only for the third stage and I don’t know if I did it right.
All your recipes are so authentic and not the typical recipe you’ll find out there for the REAL filipino recipes. Keep up the good work because you are a blessing to all the homemakers out there that are abroad and who looong for authentic filipino cuisine. I can’t wait to try your other recipes.
Thank you,
ShaSha